You’ve found the perfect rocks. Maybe you bought them from the store, or perhaps you found some beautiful, natural stones on a hike. They’re going to be the stunning centerpiece of your aquascape. But before you drop them into your tank, we need to talk about one of the most critical, and often overlooked, steps in the entire hobby: cleaning them properly.
This might sound like a simple chore, but doing it wrong can have disastrous consequences. An improperly cleaned rock can introduce harmful bacteria, parasites, toxic minerals, or pesticides into your aquarium, jeopardizing the health of your entire ecosystem.
If you’ve looked for advice online, you’ve probably found a confusing mix of opinions. Some say to just rinse them, others say you have to boil them, and some give dire warnings. It’s hard to know who to trust.
I’m here to give you a clear, no-nonsense, and completely safe guide. We’ll cover everything from the rocks you buy at the store to the ones you find in your backyard. This is the definitive guide on how to clean rocks for your aquarium to ensure they are nothing but a beautiful, safe addition to your underwater world.
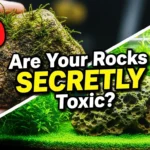
The Most Important Step: Is Your Rock Aquarium-Safe?

Before we even think about scrubbing, we have to address the most important question. Not all rocks are created equal, and some can be downright dangerous for an aquarium.
The Vinegar Test: This is a simple, non-negotiable test for any rock you didn’t buy from a pet store.
- Place your dry rock on a towel.
- Pour a few drops of white vinegar onto it.
- If it fizzes or bubbles, DO NOT use it.
That fizzing is a chemical reaction indicating the rock contains calcite or limestone, which will constantly leach minerals into your water. This will raise your pH and water hardness (KH), which can be very stressful for most tropical fish and plants.
Rocks to Absolutely AVOID:
- Anything with sharp, jagged edges that could injure fish.
- Rocks with metallic veins or shiny, flaky bits (could contain heavy metals).
- Soft, crumbly rocks like sandstone, as they will break down in your tank.
- Any rock found near a road, industrial area, or manicured lawn where pesticides and chemicals are likely present.
When in doubt, it’s always safest to use rocks purchased from a reputable aquarium or pet store.
Also Read: How to Lower Aquarium pH Naturally (A Safe, Beginner’s Guide)
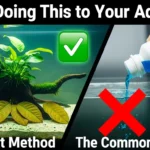
Method 1: How to Clean New, Store-Bought Aquarium Rocks

This is the easiest and most common scenario. Rocks sold specifically for aquariums are generally safe, but they are often covered in dust and debris from shipping and handling.
Your Goal: To remove surface dust and sanitize the rock.
Step-by-Step Instructions:
- The Initial Rinse: Take your new rocks and place them in a clean bucket. Take them outside or into a bathtub and rinse them thoroughly with tap water. You can use a hose or just the faucet. The goal is to wash away all the loose dust and grit.
- The Scrub Down: Now it’s time to scrub. The single best tool for this is a brand new, dedicated stiff-bristle brush. Never use a brush that has seen soap or any other cleaning chemical. Vigorously scrub every surface, nook, and cranny of the rock under running water. You’ll be surprised how much more dust comes off.
- The Sanitizing Boil (Recommended for Most Rocks): For 99% of smooth, solid rocks like river stones or slate, boiling is the best way to ensure they are completely sanitized.
- Place the scrubbed rocks in a large pot. Do not use a favorite cooking pot, as it can get scratched. An old pot from a thrift store is perfect for this.
- Fill the pot with tap water until the rocks are fully submerged.
- Bring the water to a rolling boil and let it boil for 15-20 minutes.
- Carefully turn off the heat and let the water and rocks cool down completely. Never pour cold water onto hot rocks, as this can cause them to crack or even explode.
- The Final Rinse & Placement: Once the rocks are completely cool to the touch, give them one final rinse to remove any settled particles. Now, they are perfectly clean, sterile, and ready to be placed in your aquarium.
A Crucial Warning About Boiling: Never, ever boil porous, layered rocks like lava rock or any rock that could potentially trap air and water inside. The trapped water turning to steam can cause these rocks to fracture violently. For these types of rocks, skip the boil and proceed to the bleach dip method if you feel extra sanitization is needed.
Method 2: How to Clean Rocks from Your Yard or Nature
Found the perfect stones on a hike or in your garden? This process requires more diligence because we have to assume these rocks are carrying algae spores, bacteria, tiny insects, and other unwanted hitchhikers.
Your Goal: To remove all organic material, scrub away dirt, and completely sterilize the rock.
Step-by-Step Instructions:
- The Power Scrub: This first scrub needs to be intense. Use your dedicated stiff-bristle brush and scrub every single surface of the rock with hot tap water. Pay special attention to any cracks or holes. Your goal is to remove every visible trace of dirt, moss, lichen, and organic debris.
- The Sanitizing Boil (If Safe): Just like with store-bought rocks, boiling is the best method for solid, non-porous stones. A full, rolling boil for 20-30 minutes will kill any parasites, bacteria, or stubborn algae spores. Remember to let them cool down completely and naturally.
- The Bleach Dip (Alternative to Boiling): If you have porous rocks or are simply unable to boil them, a bleach dip is an effective alternative for sterilization.
- Create a solution of 1 part standard, unscented household bleach to 9 parts water in a bucket.
- Submerge your scrubbed rocks in the bleach solution and let them soak for about 30 minutes.
- This next step is critical: Remove the rocks and rinse them obsessively under tap water. You need to wash away all traces of bleach.
- Finally, soak the rocks in a bucket of fresh, clean water treated with a double dose of a high-quality dechlorinator (like Seachem Prime). Let them soak for at least an hour, or even overnight, to ensure every last bit of chlorine is neutralized.
- The Sun-Dry: After their final rinse, letting the rocks dry completely in the sun for a day or two is a great final step to ensure they are inert and safe before adding them to your tank.
Method 3: Routine Cleaning of Rocks Already in Your Aquarium
What about the rocks that are already in your established tank? Over time, they will develop a layer of algae and detritus. Cleaning them is part of your regular maintenance.
Your Goal: To remove algae and waste without harming the beneficial bacteria living on the rock’s surface.
The Golden Rule: Never use soap, chemicals, or non-aquarium-safe cleaners.
Step-by-Step Instructions:
- Spot Cleaning (Inside the Tank): For light algae, you don’t even need to remove the rocks. Use an aquarium-safe algae scrubber or a new, dedicated toothbrush to gently scrub the algae off the rock surfaces during your weekly water change. The loosened algae can then be siphoned out.
- The Deep Clean (Outside the Tank): For rocks with stubborn algae (like black beard algae), you may need to remove them.
- Place the rock in a bucket of your old tank water that you’ve just siphoned out. Never use clean tap water, as the chlorine can kill the beneficial bacteria living on the rock.
- Use your dedicated aquarium brush to vigorously scrub the algae off.
- Rinse the rock in the same bucket of old tank water.
- Place the rock back into your aquarium. This method ensures the rock stays “alive” and doesn’t disrupt your tank’s nitrogen cycle.
Conclusion: The Foundation of a Safe and Beautiful Tank
Cleaning rocks for your aquarium is a simple task, but it’s a profoundly important one. It’s a process that protects your fish from harm and sets the stage for a stable, healthy ecosystem. By taking the time to properly test, scrub, and sterilize your hardscape before it ever touches your aquarium water, you are making one of the best possible investments in the long-term success of your hobby.
Whether you choose the simple rinse-and-scrub for store-bought stones or the more diligent process for natural finds, these steps ensure that your rocks will be what they were always meant to be: a beautiful, safe, and stunning foundation for the underwater world you are creating.

Daniel Ravera is the founder of AquaInitium, where he shares insights gained from over a decade of hands-on aquascaping. His expertise lies in the low-tech, ecosystem-first method—a philosophy he adopted after experiencing the common frustrations of algae and instability himself. As an authority in the beginner aquascaping niche, Daniel provides clear, trustworthy advice to help you build a beautiful, stable aquarium and avoid the costly mistakes he learned the hard way.